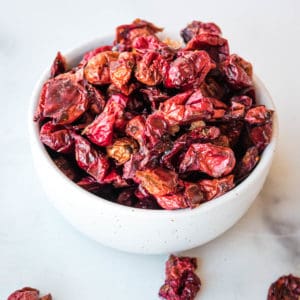
Dried Cranberries (Paleo, Whole30, AIP)
Servings: 1 cup
Finding dried cranberries that are AIP-compliant can be difficult! So many of them are made with seed oils! In this post, I show you how to easily make your own in the oven.
Ingredients
- 12 oz bag Fresh Cranberries (this is about 3.5 cups)
- 1-2 tbsp Fruit Juice or Honey
- 1 tbsp Avocado Oil (you can use olive oil too, but it may leave a taste)
Instructions
- Set a saucepan of several cups of water to boil.
- Once it's boiling, remove the pan from the stove and add the cranberries. Let them sit in the water for several minutes (about 5). Many of the cranberries should pop during this time. Don't leave them in for longer than 5 minutes as they'll start to turn mushy, and don't be tempted to boil them because they'd definitely turn mushy. IF you happen to do this, use those cranberries for cranberry sauce instead.
- Drain the cranberries using a colander, then return them to the pan.
- Mix with either a few tablespoons of fruit juice or honey (don't use honey if doing Whole30) and a tablespoon of avocado oil.
- Pour the mixture out onto a parchment-lined baking sheet and then using a small knife, pierce any cranberries that haven't popped.
- Put the pan into an oven set to 225 F and bake for 2 hours. At 2 hours, check to see if you missed any berries that weren't popped and using a knife, carefully pop them. Watch out because they can spurt out some hot juice! Continue to bake for another 1-2 hours, or until most of the moisture is out of the berries. Don't let it go too long though or they'll get crunchy, which isn't what you want for a lot of recipes. They're delicious when crunchy though!
- Remove the sheet pan from the oven and set it somewhere to cool and dry a bit more for several hours.
Notes
If you want to store the dried cranberries, put them in a glass jar or airtight container and then keep them at room temperature for another day or two, tossing them once a day. This will help remove any remaining moisture.
From there you can store in the pantry at room temperature for up to 1 month (but if you didn't use sweetener, freeze them at this point).
Otherwise you can freeze them by spreading them out on a baking sheet, baking dish, or paper plate and putting them in the freezer. Once frozen (just a few hours), pour them into a freezer-safe container or bag and store in the freezer for up to a year.
Did you make this recipe?Leave a comment below or share a photo on Instagram and tag me @thrivingautoimmune !