This post may contain affiliate links. Please read my disclosure policy.
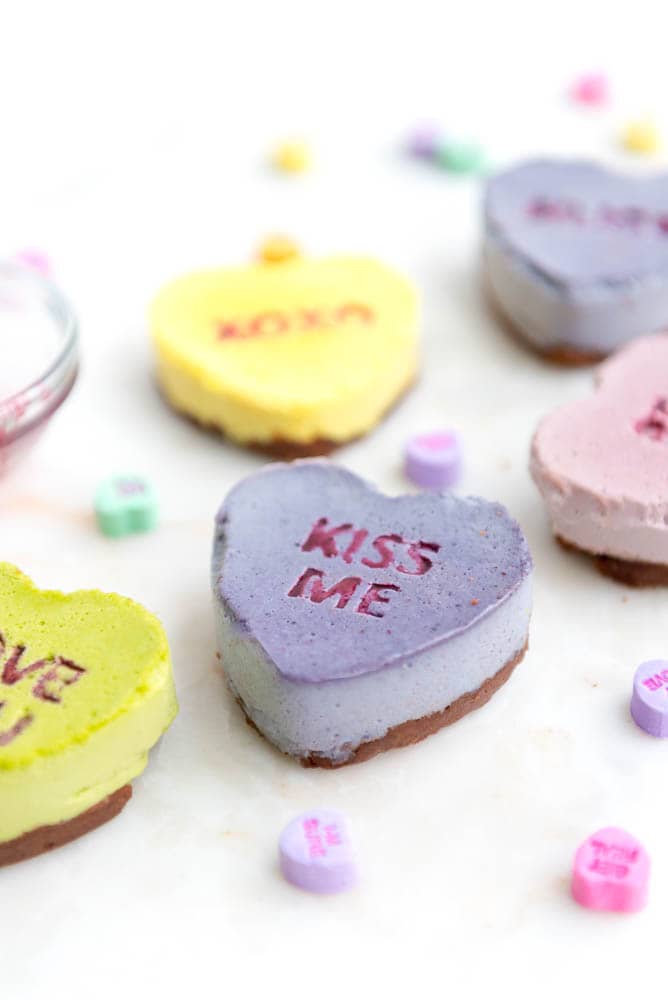
These No-Bake Conversation Heart Cakes are the perfect Paleo Valentine's Day dessert that'll get oooh's and aaaaah's from all your friends. Creamy, flavorful, and colorful cakes with a chocolatey crust. It also is AIP Stage 2 reintroduction friendly (you need cashews and almond flour) but you can make it compliant for the AIP elimination phase with some modifications.
This post is sponsored by Perfect Supplements but all opinions are my own. Also, I am a participant in the Amazon Services LLC Associates Program, an affiliate advertising program designed to provide a means for us to earn fees by linking to Amazon.com and affiliated sites.
You ever search through Pinterest and see all of these adorable cookies and desserts that you get all excited about, but then look through the list of ingredients and realize there's no way you can make them?
Whether it's because they use food dyes with weird toxic ingredients that cause your kids to be extremely hyperactive, or because you choose to or have to stay away from the gluten and sugar and other ingredients, this is quite frustrating!
Table of contents
The texture of these dairy-free cakes
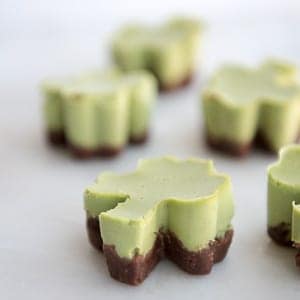
I wanted these cakes to be kind of a cross between a panna cotta and a cheesecake.
I think I succeeded with the combo of coconut milk and cashews.
It's creamy, airy, flavorful, and just plain delicious.
Note: The AIP elimination-phase compliant version is more like a panna cotta, but still delicious.
Ingredients and Equipment to make the heart cakes
The recipe requires a few things that are important.
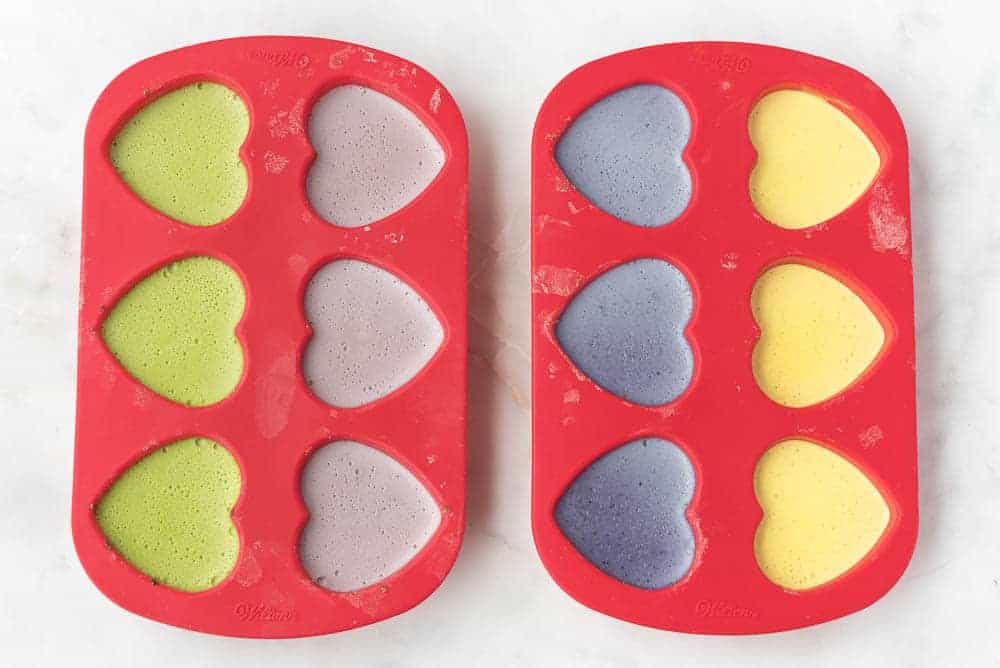
• Heart Shaped Muffin Molds: You can make these in just plain muffin tins, but you'll have round, muffin-tin shaped cake, not hearts.
So if plain, muffin-tin shaped conversation circles are what you are going for, great! Otherwise, I recommend these silicone heart molds by Wilton. If those are out you could try these as well, a bit smaller but still ok.
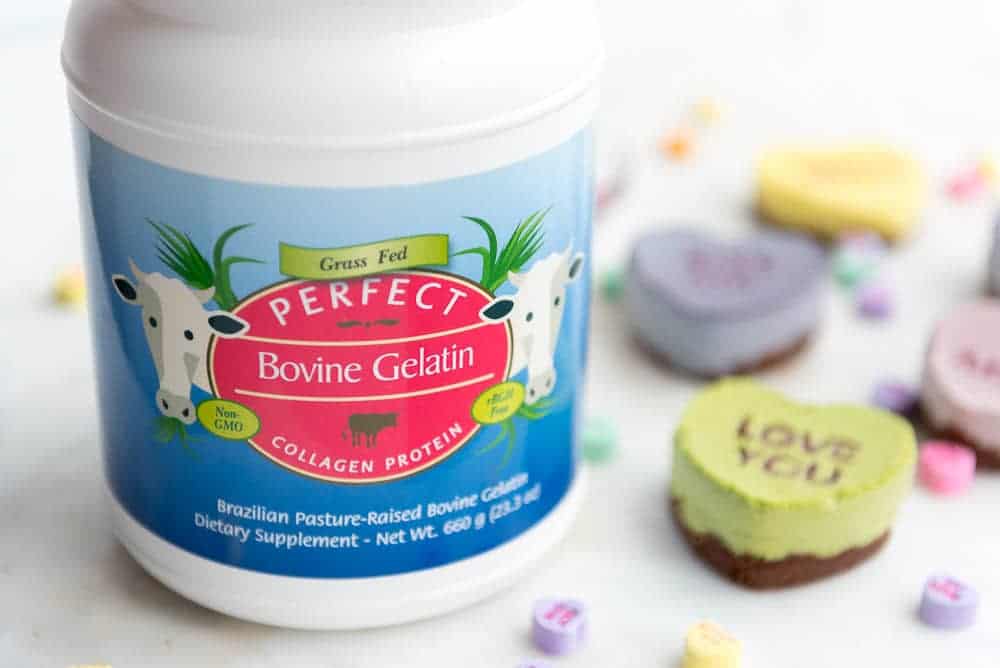
• Gelatin: Gelatin is the most important ingredient in this recipe as it's the ingredient that helps keep the cakes together, maintain their adorable shape, and give it the lovely, not at all dense texture.
I use Perfect Supplements gelatin for this as I have found it to be the absolute best gelatin out there. It doesn't clump like other brands do, it's from grass fed cows, and the best part to me is that it doesn't STINK like most gelatins do. Ever get that weird odor when opening up a canister of gelatin? It's horrendous!
Perfect Supplements has been so kind as to offer you, my readers, 10% off if you order using code THRIVING10. You can order some of this fantastic gelatin here.
(Note: If you need to keep this Vegan or Vegetarian, you can use equivalent amounts of agar powder for the gelatin)
• Letter Stamps: The last thing you might want, but don't absolutely need, are some sort of letter stamps to stamp the words on the cakes. They make your words look a LOT nicer than if you free-hand it, and the texture of these cakes doesn't allow the writing to show up very well if you just write on top of the surface. It looks a lot better if you make an indentation and then add the color in the indentation. You can of course do this with a knife or a toothpick or something, but a stamp like this just make it a breeze. Plus you can make cookies with them too…
• Almond Flour – this is the main base of the crust. I love this almond flour. If you've been on the AIP diet and are in beginning stages of your AIP reintros and have only successfully reintroduced cashews but not almonds, you can use tigernut flour or cassava flour for this instead.
• Cocoa Powder – this is what gives the crust a chocolate flavor. Use carob powder if you're on AIP and haven't reintroduced cocoa powder
• Maple Syrup – this is the sweetener I prefer to use with these cakes as it blends well with the flavors. You can use honey instead but you may taste it a lot more
• Cashews – These make these cakes creamy and more like a cheesecake. If you're unable to eat cashews (whether you're intolerant or because you're on AIP) use an additional cup of coconut milk instead. This will make it more like a panna cotta but still delicious
• Coconut Milk – this is the base of the “cake” part of this recipe. You could use a different dairy-free milk if you prefer though
• Coconut Oil – this helps the crust stay together. Unfortunately it's hard to replace this one if you need to be coconut-free, but leaf lard could be a potential solution
How to Make the Conversation Cakes
If you make just one color heart, the whole process is pretty easy.
If you make all 4 colors in one batch it gets a bit more complicated, but it still isn't really as bad as it would seem.
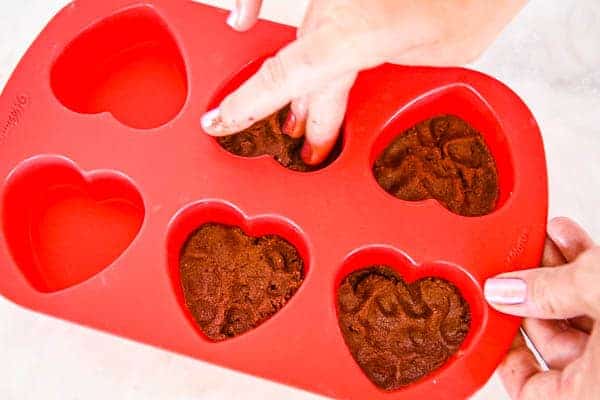
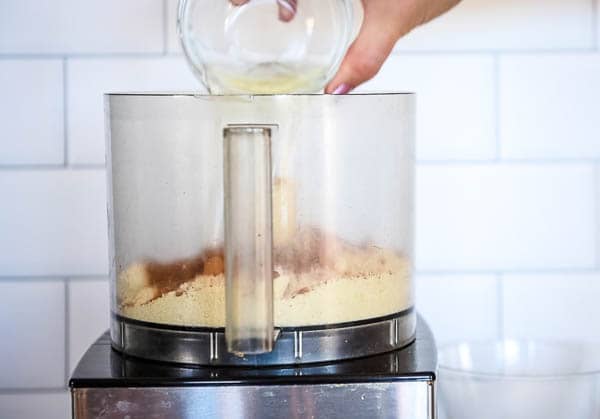
• Make the crust: You just need to mix up the ingredients for the crust in a food processor or blender and then press it into the bottom of your molds.
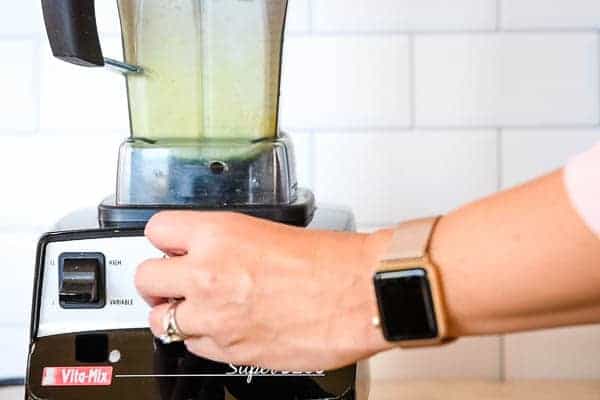
• Blend the batter: Then blend the “batter” for the cake in a blender.
• Divide the batter if making multiple colors: If you want multiple colors of cakes, divide the batter into as many colors as you want. So for example, I had 4 colors, so I divided mine into 4 parts.
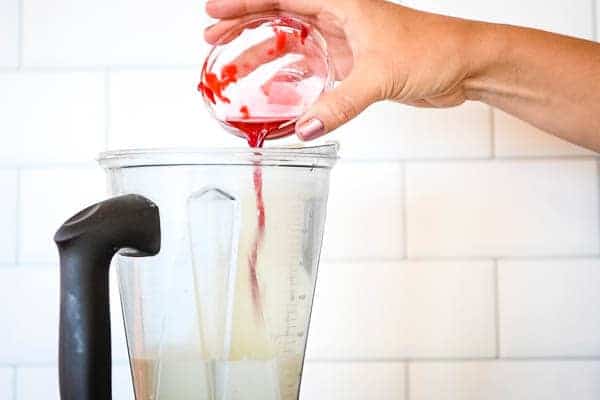
• Color each part of your batter: Take one part of your batter (or the whole thing if only making one color), add it back to the blender and add the rest of the ingredients to make that color and blend until smooth.
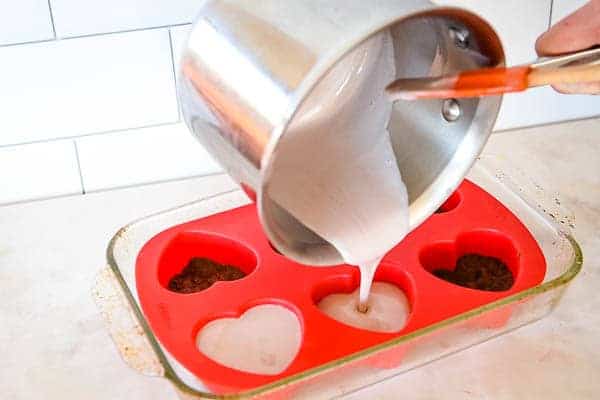
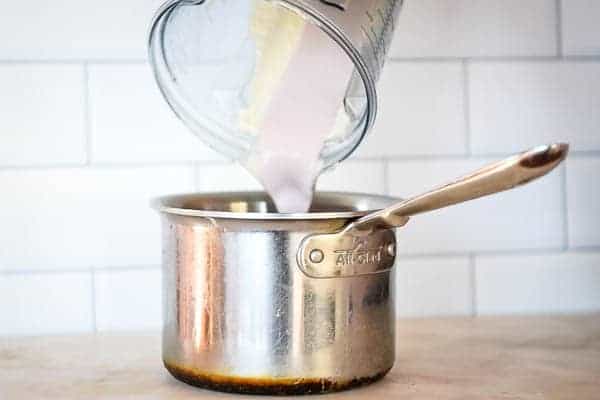
• Heat the batter on the stove: Just add the batter to a small saucepan and heat until hot to the touch. This will activate the gelatin so it will set when chilled.
• Pour the batter into the molds over the crust: Carefully pour into the molds. I recommend putting the mold into a glass baking dish or other flat surface that will fit in your fridge so that the soft silicone won't spill when you move it.
• Chill for at least 4 hours: Put in the fridge and just let it sit!
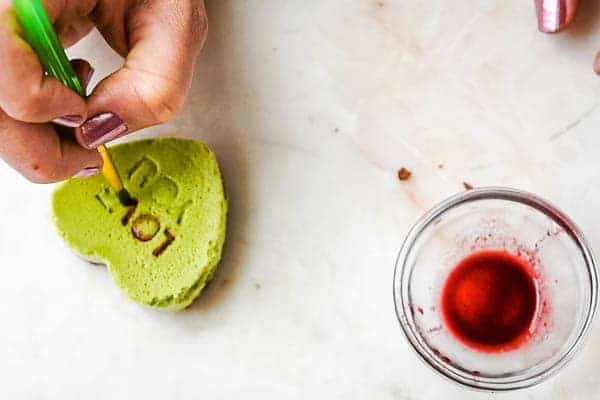
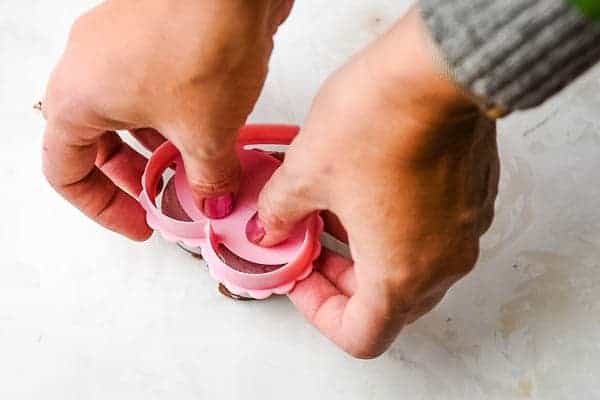
• If desired, put words on top of the cakes: Use either a toothpick or knife to carve words or use the cookie cutter I mentioned above. Using the juice from blackberries, color in the letters. Enjoy!
How long does it take to make these?
All in all, I say the ACTIVE process for making all 4 colors is about 1 hour.
For just one color the ACTIVE process is only like 15 minutes.
Then there are at least 4 hours of chilling and setting time in the fridge.
Then if you want to write the letters on top, that'll take another 15-30 minutes, depending on if you're freehanding it or using a cookie cutter for the words.
It's a lot of fun to do with your kids though, so if they like to get involved in the kitchen, make a fun afternoon out of it.

Making these AIP elimination-phase friendly
Because these have almond flour and cashews it is a Stage 2 AIP reintroduction recipe if made as-is.
However, you can make them elimination stage compliant with these substitutions:
• Use carob powder instead of cocoa powder
• Use tigernut flour or cassava flour instead of the almond flour in the crust
• Use an additional cup of coconut milk instead of cashews in the batter, to make 3.25 cups total. This will be a slightly more panna cotta-like cake as a result, but still delicious
• Add one more tablespoon of gelatin
More Helpful AIP & Paleo Resources in the Freebie Library
If you find this recipe helpful, you may really enjoy the resources in my Paleo & AIP Freebie Library! There's a “dump” freezer meal plan, a list of AIP-compliant breakfast toppings, and so much more. Plus, you'll get even more ideas sent to your inbox! Get the password here.
Conversation Heart Cake Recipe
I hope you enjoy these cute little cakes! If you make them I'd love to hear how it turned out! Either comment below or share a pic on Instagram and tag me @thrivingautoimmune!

No-Bake Conversation Heart Cakes (Paleo, AIP-modifications)
Ingredients
For the crust:
- 1.5 cups Almond Flour (use Tigernut Flour or Cassava Flour for AIP)
- 2 tbs Cocoa Powder (use Carob Powder for AIP)
- pinch Sea Salt
- 2 tbs Maple Syrup
- 1/2 cup Coconut Oil (melted)
For the cake:
- 1 cup Cashews (soaked for at least 4 hours and then drained (see note for faster method) – use 1 cup Coconut Milk instead for AIP)
- 2.25 cups Coconut Milk (about 1.5 cans)
- 1/4 tsp Sea Salt
- 1/2 cup Maple Syrup
- 2 tbs Gelatin (add 1 more tbsp if using mroe coconut milk instead of cashews for AIP)
- 1 tbs Coconut Oil (can be solid)
For Purple color (for 3 hearts):
- 3 tbs Frozen Blueberries
For Pink Color (for 3 hearts):
- 4 tbs Frozen Raspberries
For Yellow Color (for 3 hearts):
- 1 Lemon (zest and juice)
- pinch Tumeric
For Green Color (for 3 hearts):
- 1 large handful fresh Spinach (about 20 baby leaves)
- 1/2 tsp Peppermint Extract
For Orangey Yellow Color (for 3 hearts):
- zest of 1 Orange
- juice of 1/2 Orange
- 1/2 Carrot
For Writing
- 3 tbs Blackberries (fresh or frozen)
Instructions
Make the crust (bottom layer):
- Make the crust first by mixing together all of the crust ingredients in the food processor until it comes together.

- Scoop out a little crust mixture with your hands and press into the bottom of the heart mold – about 1/4 inch thick. Divide equally amongst the 12 hearts. Put in the fridge to start to harden while you work on the cake part. I recommend at this point putting the heart molds into a baking dish to support the molds, since when you fill them with the liquid after the next steps it will be really hard to move without spilling if not in a solid container.

Make the cake "batter":
- In a blender, mix together all of the cake ingredients, except for the colorings. Blend for about 30 seconds to really mix well. At this point you should have 3 cups of mixture. If you do not, add a little more coconut milk and blend again.
- If making 4 different colors, remove all but 3/4 cup of the mixture from the blender. If just making one color, leave it all in there. (If making another amount, you need 3/4 cup per 3 hearts, so you can do the math).
For the purple color:
- Microwave or heat the blueberries just until they start to get soft and release their juices, which is about 20 seconds in the microwave. Add directly to the blender and blend.
For the pink color:
- Microwave or heat the raspberries just until they start to get soft and release their juices, which is about 20 seconds in the microwave. Then press the raspberries through a fine mesh sieve over your blender to pour the juice into the mixture. Blend until incorporated.
For the yellow color:
- Add the lemon juice and zest and turmeric directly to the blender. Blend until incorporated.
For the green color:
- Add the spinach and peppermint extract directly to the blender. Blend until incorporated.
For the orangey-yellow color:
- Add the orange juice and zest and carrot directly to the blender. Blend until incorporated.
Finish the cakes:
- Then pour into a small sauce pan. Heat the mixture gently, stirring often, until hot to the touch.
- Let cool for a few minutes, then pour into the heart molds.
- Repeat with the remaining colors if desired, washing out the blender and sauce pan in between colors. If you only are doing one color for all 12 cakes, just multiply the amount of coloring ingredients by 4, so like 3 tbs of Blueberries would be 12 tbs (3/4 cup).
- Put in the fridge and leave until set, at least 4 hours.
- Once set, remove from the molds. Then use stamps, a toothpick, or a knife to make the words if desired.
- Microwave the blackberries for about 20 seconds or heat on the stove to release the juices, then push the juice through a fine-mesh sieve into a small bowl. Using a fine-tip paintbrush, paint the words using the blackberry juice.
- Store in an airtight container in the fridge until ready to serve.
Notes
Nutrition
This post is sponsored by Perfect Supplements.
Love the video! Makes this so simple! Awesome recipe.
Thanks Mark!
These are precious. Laughed when you mentioned dates and cashews horrifying yours sense of nutrition and your wallet… been there!
OMG! I love these! What a great idea!
Thanks Katja!
I can personally say I’ve had somewhere in the neighborhood of 20-30 of these and they still delight. Full disclosure-I’m M’s huubby, but they’re legitimately scrumptious.
Aw thanks Mr. Spring 🙂 Glad you like the stuff I make you eat.
These are so cute, and I bet they taste better than conversation hearts too!
These no bake heart cakes are so adorable !! I think I’m in love !!
How creative! These are beautiful, gelatin is the best!
These are so special! I LOVE this idea (and love the gelatin too)!!! So fun for the whole family.
Thanks Emily! The gelatin rocks!
These are adorbs! Perfect for vday 🙂
Thanks Tina!
Oh goodness! This is so creative! I had no idea what to expect on the ingredients when I saw the preview of this! They look exactly like conversation hearts too! Beautiful! My girls will love this!
Thanks Renee! I hope they enjoy them and have a happy Valentine’s Day!