This post may contain affiliate links. Please read my disclosure policy.
A creamy, thick, dairy-free coconut yogurt made will satisfy that desire for yogurt without making you sick if dairy is a problem! Super easy to make and Paleo, Whole30, AIP. (I also give an alternative for using tigernut milk if you need to be coconut-free)
Whether dairy sends you running for the nearest toilet or slowly brings on symptoms of an autoimmune disease flare, cow's milk yogurt probably is out for you.
Instead, enjoy this dairy-free coconut milk based yogurt that has the same tangy taste without the side effects.
Table of contents
Easy to Make
This yogurt is actually pretty simple to make.
It's just a matter of dissolving some gelatin (or agar agar powder) into the milk to help thicken it up, and then adding a probiotic, sweetener if desired (helps the probiotic eat), and then incubate for at least 10 hours to let the probiotic do its thing.
I give several options on how to incubate below – the main idea being that you want to keep it at a steady, warm temperature.
In the recipe I give a way to incubate via Instant Pot (my favorite method as I find it to be the most consistent), oven, and even in a regular cooler – like the kind you throw drinks and ice into on a hot summer's day.
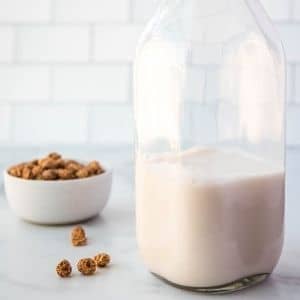
I like using full-fat, canned, guar-gum-free coconut milk for this, but homemade coconut milk also works.
Coconut Milk Alternatives (aka – make this Coconut-free)
Of course if you can't have coconut products, coconut milk won't work well for you.
HOWEVER – I've found that tigernut milk (good if you're on AIP) seems to work well, though perhaps a bit thinner in consistency, and other dairy-free milks like almond, cashew, etc can work as well.
Yogurt Starter Options
I wrote the recipe below using a good quality probiotic to help it to be compliant for most diets, especially the AIP Diet (Paleo Autoimmune Protocol).
However, if you have a regular powdered yogurt starter you can use that instead – it just often is derived from rice so keep that in mind.
You can also use about 1/4 – 1/2 cup of previously made yogurt in place of the probiotic or powdered starter, however, I don't find this works as well as it does with dairy-based yogurts. So do so at your own risk.
What to do with the coconut yogurt
Once you have some made – what do you do with it?
Well, many things!
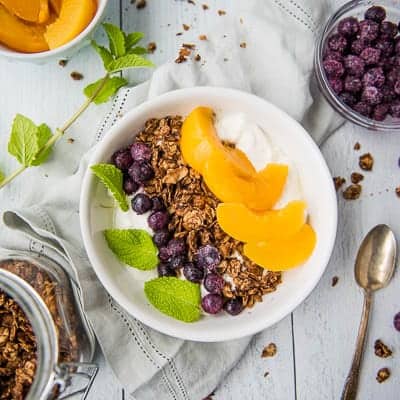
One of my favorites is to top it with some fruit and “Chocolate” tigernut granola (this is AIP compliant!)
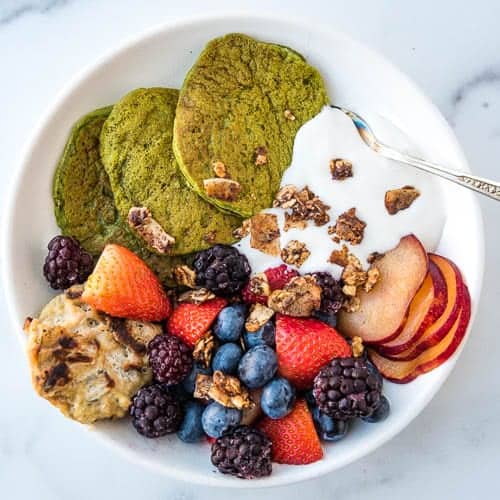
You could also just eat it plain, add some mashed fruit or jelly into it, add it to a smoothie, or even dollop it onto a plate of pancakes! (Pictured below, the spinach version of the AIP Pancakes)
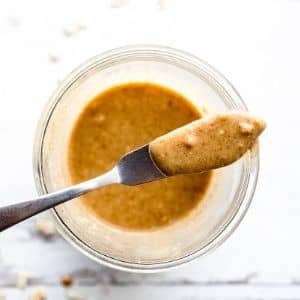
You can also use it in savory sauces – like the Tzatziki Sauce for these gyros (use in place of the coconut cream) or a Green Goddess Sauce.
More Helpful AIP Resources in the Freebie Library
If you find this recipe helpful, you may really enjoy the resources in my Paleo & AIP Freebie Library! There's a “dump” freezer meal plan, a list of AIP-compliant breakfast toppings, and so much more. Plus, you'll get even more ideas sent to your inbox! Get the password here.
Coconut Yogurt Recipe
If you make this yogurt, I'd love to hear how it turned out! Either comment below or share a pic on Instagram and tag me @thrivingautoimmune!
Coconut Yogurt (Paleo, Whole30, AIP)
Ingredients
- 1.5 to 2 cups of Coconut Milk (or Tigernut Milk for a coconut-free AIP version)
- 1/2 to 1 tsp Gelatin (use Agar Powder for a Vegan/Vegetarian version)
- 1 capsule high quality Probiotic (broken open and the contents dumped into the milk)
- 2 tsp Maple Syrup (optional, but mainly for the bacteria to feed on)
Instructions
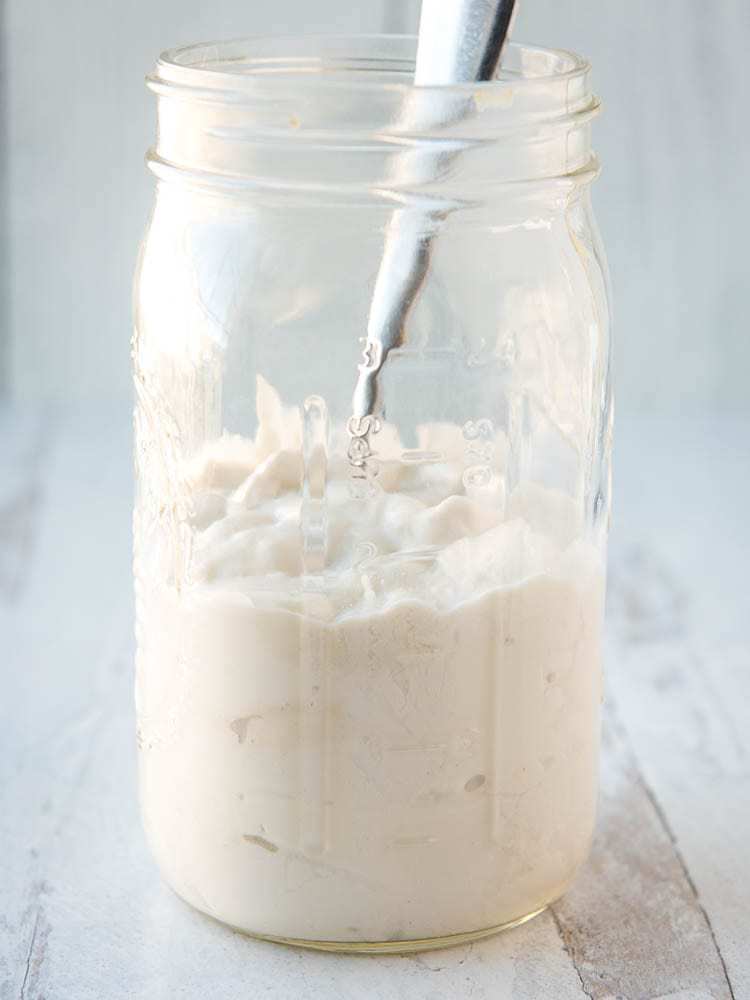
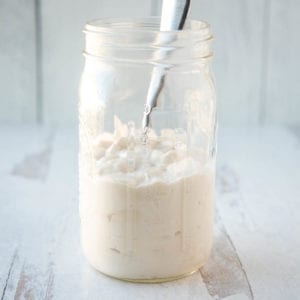
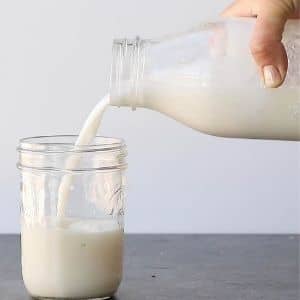
- Place the milk into a sauce pan on the stove. Sprinkle the gelatin over the milk and let sit for a minute. Turn the burner on to medium heat and whisk the gelatin into the milk. Let the milk heat, stirring occasionally, until it’s hot to the touch and the gelatin is completely dissolved. It’s ok if it bubbles a bit, but don’t let it come to a complete boil.
- Let the milk cool off for a few minutes, until it just feels warm to the touch (if you have a thermometer, It should be around 110 F.
- Add the maple syrup (if using) then break apart and empty the contents of the probiotic capsule into the milk and whisk thoroughly. Pour the mixture into a pint-sized glass canning jar then do ONE of the following:
INCUBATE IN THE INSTANT POT:
- Put the jar of milk into the basin of the IP. Turn the Instant Pot on, choose the Yogurt Setting, and then manually adjust the time to 18 hours. You can of course do less, but it won’t be as tangy and may not set up as well. I wouldn’t go less than 10 hours.
INCUBATE IN THE OVEN:
- Cover the jar with cheesecloth and place the yogurt into the oven with just the pilot light on for 24-48 hours.
INCUBATE IN THE COOLER
- Add hot water to a cooler and then place the jar covered in cheesecloth in the water (it should only come up a few inches on the outside of the jar). Close the cooler and let sit for 12-24 hours.
Notes


I use my pressure cooker and the first time I made this it turned out perfect. The last two times it has separated, even after I stir it and put it in the fridge. I stir it, or blend it with my blender wand before eating it and the taste is fine. Any ideas what I’m doing wrong?
I have a question. Can collagen powder be used in place of gelatin? Thank you!
Unfortunately, not if you want the yogurt to become more “solid” and not stay a liquid – the collagen powder doesn’t have the same gelling capabilities as gelatin. It essentially just has the protein but won’t help to solidify the yogurt once it is cooled (after being heated).
This recipe is easy and the best I have ever tried. I leave mine in for my Instant Pot for 15 hours, it comes out perfect. Thank you!
I do have a question. Can I put 3-4 jars in my IP rather than just one? Would the time need to be adjusted?
Thank you, Michele
I’m so glad you enjoyed it! And YES – you can add as many jars as will fit. I don’t find that the time needs to be adjusted at all either.
Hi Michele
I love all your recipes. Thanks.
What high quality probiotic capsule do you use for this recipe following the AIP diet?
Eh, sorry – unfortunately I’m not sure at the moment which ones are AIP-compliant as they change formulas so often! If you already take one you could try that or the one I take currently is Seed – but I’m also not on AIP at the moment so while it’s super clean there *may* be something not AIP-compliant in it.
I prepared this recipe in my Instant Pot for 18 hours. When I removed the jar, it looked like about 1/3 was a thick liquid at the bottom of the jar. I stirred it up and put it in the fridge. Is this common?
yes, just put it in the fridge and it should set up
I cannot wait to try this recipe. I miss yogurt and granola, so this looks amazing. Can I use more than one jar in the Instant Pot at a time? For example making three separate servings.
Yep, you can fill your IP with as many jars as will fit!